 Industry Standards for Pest Control Marijuana Venture Magazine - September 2015 Anyone who has been cultivating for more than a year or two has experienced the challenges associated with pest control, and they are both unpleasant and unavoidable, especially in a large-scale setting. The standard list of cannabis predators includes powdery mildew, aphids, mites, gnats, white flies, and thrips, with powdery mildew and mites being the most difficult to permanently eradicate. Even though mildew isn’t an insect, it still falls under the rubric of “pest control” because it’s a living organism that attacks and destroys cannabis. Pests enter a grow room in one of three ways- through openings in the building, on the skin, hair and clothing of workers and visitors, and on plants brought in from other locations. In this sense, taking steps to prevent these various kinds of breaches is the first and most important part of maintaining a pest-free environment. Standard prevention techniques include the following:
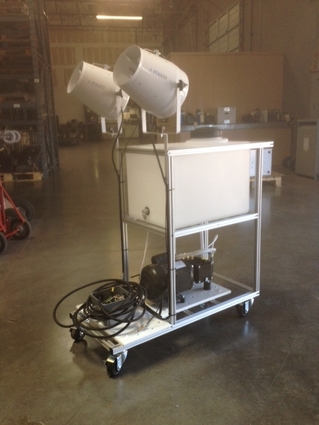
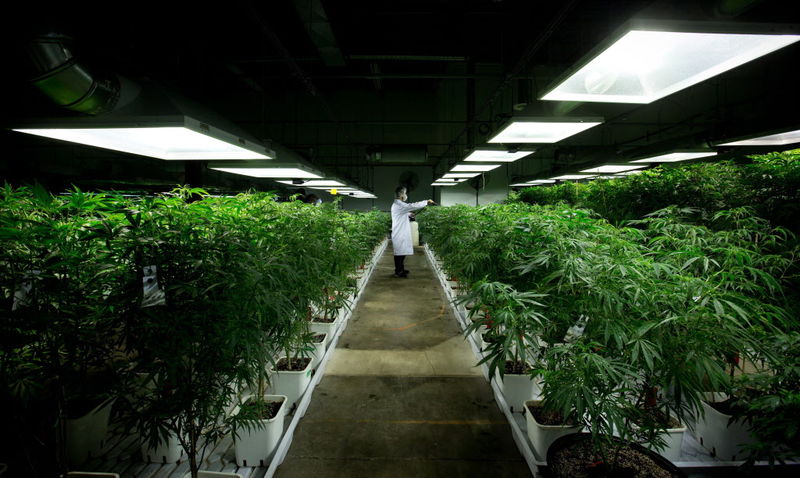
With the right prevention steps being taken, the frequency of infestations will dramatically drop, but will probably still happen from time to time. This is why cultivation sites must be prepared for pest treatment by utilizing the right kinds of equipment and supplies once preventative measures have failed. If you’ve seen many indoor commercial cultivation spaces, you will have noticed the modular build-out design that has become standard. Grow sites are subdivided into individual rooms that range in size from 200 to 2000 sq. ft. Besides allowing for more targeted and efficient environmental controls, these subdivisions make pest problems more containable and treatable when they happen. Once a problem has been identified, the room is shut off from the rest of the site while a special crew addresses the problem, and this increases the chances that the problem can be controlled quickly without spreading to other areas. In most cases, infestations are treated with sprays of some kind, and going into the details of all the various sprays and insect types is a much larger discussion than can be covered in this article. What’s most important is that the spray is applied properly, and that means using atomizers, also sometimes referred to as foggers. Atomizers reduce the micron size of liquid particles to the point where the room is literally being humidified rather than just merely sprayed. This ensures absolute coverage of all the plant surfaces. Complete coverage is further augmented by the use of a surfactant in the spray mixture that keeps water particles from beading up, much the way detergent works in a clothes washing machine. Many growers will claim that certain sprays have failed at handling a pest problem when, in fact, the application method has been the problem. With an atomizer and a surfactant, variables are eliminated from the equation, such that the substances being used for treatment can be assessed for what they are. Some sprays act on contact with the plants, whereas others take some time to have an effect. Those that act on contact are often best washed off quickly after being applied in order to minimize potential damage to the tissue of the plants, that many sprays are known to cause. Additionally, floors and work surfaces should be washed shortly after the treatment application in order to minimize worker exposure to harmful residues, which is often the riskiest aspect of pest control for commercial grow operations. Workers should wear protective outerwear and gloves both during and after the treatment process to minimize contact with any sprays that could have health consequences when used in concentrated quantities. No grower can live a life without pests, but taking comprehensive steps towards prevention and using reliable treatment systems can certainly minimize the pain and suffering that comes along with the territory.
1 Comment
Source: Marijuana Venture Magazine Method Seven Glasses Method Seven is the industry leader in cannabis eyewear. Having started out with just HPS color correction four years ago, they now have a full line of options for all different kinds of indoor lighting, including HPS, LED, and MH. What many people don’t know about Method Seven Glasses is that they save your eyes from harmful UVA, UVB, and UVC rays that are emitted by HID lights. Yes, you can actually harm your eyes over time in an indoor grow room, and regular sunglasses aren’t effective at correcting or color balancing for this environment. Even under fluorescents, Method Seven Glasses feel good to wear because they reduce the eye stress caused by compensating for the continuous flickering of ballast-based lighting of all kinds. Just released is their unique “photochromic” lens that transitions to a regular sunglass shade when outdoors, then back to HPS correction indoors. Price range is between $59-$169 based on the features. Visit MethodSeven.com to purchase a pair and for information that’s specific to your particular circumstances. ProScope Micro Mobile Smart Phone and Tablet Magnifier ProScope has its own special niche as a producer of high quality portable and mobile microscopic gear. Their smart phone and tablet attachments let the digital device do all the heavy lifting when it comes to focusing so you can concentrate on getting a good close-up photo of the exact insect trying to ruin your life. The Micro Mobile comes with a bi-directional blue-spectrum LED backlight that can be added to the image whether you need some color correction or just more light. Now, when you find microscopic evidence of an insect, mold, or nutrient problem in your garden, you can take a beautifully magnified snapshot of it for later reference. The higher the megapixel rating of your camera, the better the quality of your final picture. Zoom levels range from 20x-80x. Coming in at a retail price of $149, this gadget is a must have for serious plant technicians. Visit Bodelin.com for more information. Milwaukee Handheld Dissolved Oxygen Meter For those of you who don’t already have pH and TDS meters mastered, start there first, but then graduate to a dissolved oxygen (DO) meter. If you thought calibrating a pH meter was annoying, DO meters are worse. They need almost daily calibration, and it must be carefully done. Even a single tiny water bubble in the electrolyte solution will give a false reading. Several scientific instrument companies sell DO meters, but Milwaukee is tried and true, and has great customer support and videos to help you get a feel for the device. Once you start measuring DO, you’ll learn the patterns of oxygenation in your reservoirs and nutrient mixes and can test to ensure that your aeration and oxygenation methods are doing what you expect. You’ll find that the best air stones top out between 8-9 mg/l (ppm), and you’ll start getting a feel for how long it takes to saturate the water with oxygen, and then how long it takes to dissipate once the aerator is removed. For all the plant geeks among us, this is a whole new and exciting world of empirical data we can use to take our growing skills to the next level. These meters are priced around $165 and can be bought on Amazon.com and through various other retailers. Make sure to order an extra bottle of electrolyte solution so you’ll be set for a while. O2Grow Water Oxygenator
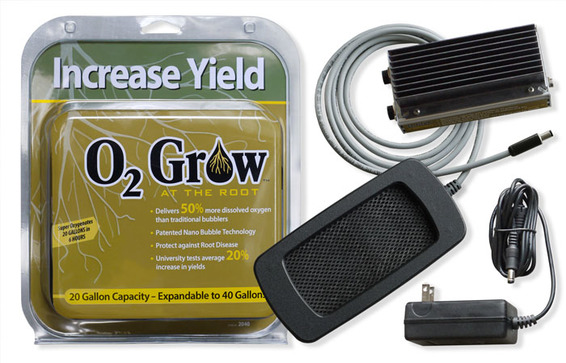
O2Grow is a new kid on the block in the cannabis industry. Having come from the fishing industry, this device was created to keep fish healthier while in captivity. More oxygen is almost always a good thing, and this is especially true with plant nutrient solutions and reservoirs. This iridium-based electrolysis device can bring your dissolved oxygen (DO) levels 50% higher than the best of all traditional aerators and air stones. It takes a little practice to get the most out of it- you’ll need a DO meter (see below), a non-bubbling water circulator, and you’ll find it necessary to always add nutrients first. Don’t use overly thick organic mixes, and apply the newly oxygenated blend immediately after the unit completes a 3-hour cycle. In the case of a reservoir, run the unit 3 out of every 24 hours to avoid overtaxing it. It has an operating life of 1600 hours before the emitters need to be replaced. O2Grow is developing larger and larger units all the time to accommodate commercial-scale use and is also developing units with their own cycle timers and water circulators. Starting at $299 for the 10-20 gallon size, these units make possible a plant performance improvement factor that has been previously unavailable to marijuana growers. Visit O2Grow.com for more information. Source: SF Evergreen Magazine
If you spend any time visiting dispensaries or reading about trends in the cannabis culture, you’ve surely encountered some of the same strain names on multiple occasions. Although hundreds of varieties are available to smoke and cultivate, only a few dozen can be found in clone or seed form at local retail shops. Dispensaries tend to carry strains they know will sell quickly, and that information is largely based on word of mouth. Any other strains can only be acquired through underground sources, including European and Canadian seed banks. Caution: Importing and shipping marijuana seeds is illegal. Most people succeed at it, but it is not a risk-free endeavor. The five most popular strains in the SF area are Granddaddy Purple, Sour Diesel, Blue Dream, OG Kush, and Girl Scout Cookies. Most of these have been around for years and stay around because they continue to satisfy in one way or another. They are all clone-only strains, meaning that the original creator crossed two different varieties and found a winning female child among them. That grower then cloned that one child plant and created thousands of identical plants for us all to enjoy! Some companies might sell seeds with these same strain names, but you cannot trust that they’ll produce the exact same plant. Clones from a reputable retailer are more likely to be authentic. Granddaddy Purple (GDP) emerged on to the scene about 10 years ago as one of the most stable and frosty purple strains. Up till that point, finding reliably purple flowers that also had good potency was fairly rare. GDP, especially under cooler conditions, fit the bill. Further, it’s short structure makes it a perfect choice for winter grow rooms with limited ceiling height, producing colorful buds during a time of year when the Northern California outdoor harvest brings a glut of low-cost B-grade herb to the wholesale scene. Having something with a striking hue and a sticky surface guarantees successful market reception when times are tough. GDP is fairly easy to grow. Because it is short and stocky, it requires less staking and trellising and, since the nugs are super solid, the trimming process is simple and straight forward. It’s a slow grower and only yields a moderate amount of finished smoke per sq. ft. That might make it sound unappealing, but no other widely known purple strains can do any better. Sour Diesel is quite the opposite. SD is a production strain, with high yield being its main selling point. It can grow and yield twice as much as GDP, and thus has become an outdoor favorite, known for its lanky and branchy structure. The buds can be dank, frosty and potent. Due to its sun-loving nature, indoor growers have a harder time getting top-shelf results from Sour Diesel, but they still get plenty of yield. Sour Diesel stretches way out, making it a poor choice for confined spaces, unless trellising is your favorite pass time. Overall, it’s an easy strain to grow. Blue Dream is another production strain that gives Sour Diesel a run for its money. With consistently great yield and quality, both indoor and out, and a flavor like a spicy-fresh spring day, the only reason NOT to grow this strain is because everyone else is already doing it. The plant structure is more sativa-like in appearance, but it doesn’t stretch out too much or have a long flowering period. Yield is excellent. Better still, Blue Dream has a wide tolerance for nutrient imbalances and other health problems without losing quality and potential. In the pantheon of excellent cannabis strains, this one deserves a seat at the top for possessing all the best qualities across the board. OG Kush is mainly prized for its potency and strong indica-dominant flavor. It is neither very easy to grow nor high yielding, but it’s got urban appeal and is almost synonymous with the California pot culture. The plant structure is stretchy, a little bit weak, and the foliage is fairly sensitive to less-than-ideal environmental and nutritive conditions. The flowers are super frosty popcorn buds that are easy to trim. OG Kush is a good strain to grow in the off season when quality trumps quantity, and its got its own army of fans that will continue developing its potential as an all-around winner. Girl Scout Cookies is the most recent Bay Area staple strain, having emerged onto the scene around 2010. It now sits along side OG Kush as offering such an excellent consumption experience, that it’s worth putting up with its less-than-perfect cultivation temperament. As with a few others of these clone-only contest-winning varieties, some confusion and debate exists around which “cut,” or phenotype, of this strain is the real deal. The phenotype that’s become standard in Bay Area retail stores has a similarly finicky nature to OG Kush, with stems tending to be purplish and growth easily delayed by minor nutrient or environmental imbalances. Unlike OG Kush, it has a stronger overall physical structure and a classic Christmas Tree shape. The yield is moderate, but the density and resin content are world class. Source: Marijuana Venture Magazine
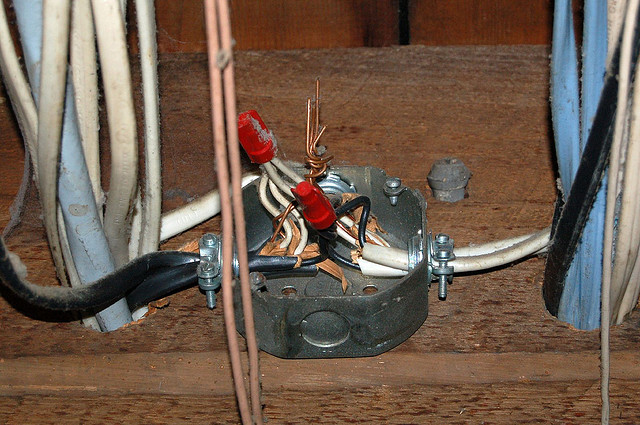
State-legal cultivation operations are up and running in Washington and Colorado, and knowing what legal growers have learned from safety inspectors can save you time and money as you build and develop your own legal cultivation operation. Regulations vary somewhat from one municipality to another, but many compliance issues are to be expected in any licensed grow operation in the US. Of course, regulations always cost extra money, especially during setup, so figure in an extra 30-40% in initial investment cost to cover all the bases that underground growers might have avoided in the past. Extra costs will come in the form of permits, automated air quality tracking and ventilation equipment, extra exits, added electrical outlets (no extension cords allowed!), sprinkler systems, and reporting responsibilities. If you design your system smartly, you can make that money back over time in the savings from a good HVAC system and efficient lighting technologies. Besides the basics of safety and accessibility, fire department inspectors are beginning to take on some special responsibilities that relate specifically to marijuana grow sites, including odor control, fumigation, Co2 enrichment, and chemical and pesticide use. Wastewater is often also regulated, but this is usually handled through a different department. This is all new territory for regulators, so the rules should be considered a work in progress, and grow site managers need to stay in regular communication with inspectors in order to help develop and respond appropriately to this quickly evolving industry and all of its unique circumstances. The application process for a legal grow operation usually requires detailed information from the licensee relating to how all of the safety and energy-related issues will be handled, so many decisions must be made and explained long before a new site is built out. While the state regulations will spell out most of the details, a few are left unmentioned, both because they are considered obvious by regulators and because, historically speaking, cultivation equipment manufacturers have not been accustomed to playing by the same rules as manufacturers of equipment for legal commercial industries. One significant example of this is UL Listing. You’ve probably noticed that term on your home appliances and not realized its significance. UL (Underwriters Laboratories) is the certifying body for electrical products in the US (other countries have their own specifications), and fire departments usually require this certification for the approval of commercial projects. It ensures the safety of the product for general use. Little do most growers know that most cultivation equipment, particularly lighting, is not UL listed. Why? Because getting UL certification costs money, and 99% of the cannabis cultivation market hasn’t been concerned with it due to the fact that fire inspectors haven’t been involved in grow operations until recently. Have a look at your digital ballasts and you’ll see that they most certainly are not UL listed. A few brands are an exception to this, and those are the ones you should get. For lights, and for any other equipment that plugs into the wall, ask the company about UL listing before investing in their products. You don’t want to drop a big chunk of change on lights and then have the fire inspectors reject them. Many companies that are not currently UL listed are ready to jump on the bandwagon as soon as the market demands it, so it’s really worth having a conversation with them if the light you love isn’t yet listed, especially for a large-scale project. The companies might want your business badly enough to jump through the hoops in short order. Take note that some companies might claim UL listing, only for you to find that their components are UL listed, but the lighting system as a whole is not. Be sure to ask that question before making a purchase and get a second opinion from the inspectors. Besides having all the right construction, engineering, and equipment, be prepared for all sorts of rules relating to the substances your plants are being treated with or otherwise exposed to. As mentioned earlier, the substances that go down the drain are in one category, usually regulated by the water department, and the substances used in the air that can affect worker health are in another category that is regulated by the fire department. These include pesticides, herbicides, fungicides, ozone, Co2, and other fumigants. The fire department needs to make sure workers and visitors are safe during times of normal operations, as well as in the event of equipment malfunctions. Thus, they set maximum allowable levels of Co2 and ozone that can be present in a room, and require monitoring and automated ventilation if those levels are exceeded, as well as signage that warns everyone of the use and risk related to such substances. Each state has its own list of approved pesticides, herbicides and fungicides, and rules are regularly being drafted and amended as it relates to cannabis, given that as a consumable good, it is both a medical product (in most cases) and is usually consumed through combustion, where other consumable agricultural products are usually eaten. Check your state’s guidelines for more information. Sorry underground growers. We have entered the era of regulated cultivation. Things won’t be as cheap, easy, or profitable as they used to be, but at least we can have more faith that the crops being produced are consistent, safe, and healthy for everyone to consume. Source: SF Evergreen Magazine
This month, we had some questions about growing top shelf herb. How possible is it to produce medicine that you love as much as your favorite strain at the dispensary? How long should it take to get really good at growing A+ nugs? Well, just like any other skill, cultivating cannabis like a pro takes some time. You have to make a lot of mistakes, learn how to recognize symptoms early on, and correct problems as quickly as possible when you find them. Flowering plants develop very rapidly, often changing in appearance every single day of their 8-10 week cycle. One wrong move on the part of the gardener can damage the potential of the final product, even if the mistake is corrected within a day or two. Over the past 19 years that I’ve spent growing, seeing other operations, and talking to countless other cultivators, the most common problematic theme I’ve encountered has been excess complexity. Growers have to be smart in a scientific way, but also in an intuitive way, being able to sense something slowly going out of balance, take a guess at what it could be, and then systematically correct it in a way that either “rules in” or rules out the accuracy of their diagnosis. If, for example, your plants looked good yesterday, but today they don’t look quite as good, be worried, get to work right away, and don’t change too many things at once. Without expensive scientific instruments analyzing the leaf tissue, root zone, and nutrient mix, we often cannot know exactly what is making the plants suddenly less vigorous. We have to draw on the insights of experts in combination with a review of the treatments that led up to the occurrence of the problem. The first major things to check are: 1) Is the water drainage from the plants within the desired range for pH and ppm (parts per million)? Outside of the range of 5.7-6.3 pH, plants cannot get the nutrients they need. Outside the range of 700-1800ppm, they are getting either too little or too much food. 2) Did the lighting change? 3) Were the plants recently sprayed or treated with a new substance of any kind? 4) Are there any new insects flying or crawling around? 5) Have there been any recent changes in ambient temperature, humidity, or ventilation? Hardly any grower gets the same quality of harvest every time, but the best growers come very close, and this is due to finding a system that works and sticking with it. You can spend an entire lifetime trying new products to make your harvest even better, but if you change things too much too frequently, you’ll remain lost in a sea of confusion for the lifetime of your operation. With each flowering cycle you complete, your skills will improve at zeroing in on a system that works for you, and as soon as you find it, cut your variables to a bare minimum in order to maintain your quality and consistency into the future. Anyone can grow world-class weed, so let me end this month’s column with a list of requirements for obtaining great ganja, and this will give novices a solid starting point from which they can divert as they become more experienced. 1. Use at least 750 watts of HPS light (or the equivalent) per 25 sq ft of grow space. If plants seem unhealthy, back the light off until they bounce back. They don’t like being pressured to photosynthesize when something is out of balance. 2. Use a pot that is no less than one-third the size of the full-grown plant. In other words, if your pot is 5 gallons in size, the plant can grow to triple that size in its dimensions. Any bigger for that same pot size, and bud development will be limited. 3. Maintain the pH of the medium between the ideal of 5.8 – 6.2. 4. Maintain the ppm of the medium between 900 – 1500. 5. Check the pH and ppm of your water run-off every time you water and immediately correct anything that has gone out of range with a counterbalancing water mixture. This is how you manage your medium. You’ll need a good nutrient/pH meter for this, which is a must-have for any grower. I like the Bluelab Guardian. 6. Use a fertilizer that has been made for cannabis plants, and consider all your additives and the affects they have on the NPK balance of the entire nutrient mix. 7. Leach your plants every 3 weeks simply to reset the nutrients, which often get out of proportion with each other. 8. Maintain lots of ventilation and air movement. 9. Don’t overwater. Full-grown plants that are healthy and well proportioned in size to their pots should need water every 3-4 days. If they are drying out more quickly, they need bigger pots. If they are drying out more slowly, they are either too small for their pots, or one of the issues listed above is out of balance, which is keeping them from growing normally. 10. Keep a notebook of all the changes you’ve made and the results those changes have had, and try to make only one change at a time. Most changes, whether in the ambient environment or inside the root zone, show their effects in 1-3 days. By day 4, if the plants look the same, you can most likely consider your change to be inconsequential. With all these factors in mind, if you are committed, you can be growing great quality herb within a year or so. If you are lucky, even sooner. ;) Source: SF Evergreen Magazine
For all you home growers out there who want to get the most out of every harvest, your best quality trim and smaller buds are valuable commodities. The presence of sticky resin on any leaf matter directly translates into a yummy concentrated toke if handled properly. Several low-cost home extraction methods make it fun and effective to separate trichomes into top-notch head stash. Here’s an overview of good possibilities. Screen Technique Screening is the oldest form of hash making. It simply involves getting 2-3 different micron sizes of screens, preferably stretched onto frames, and sifting the dried trim until the resin glands drop through the screens. The resin, or “kief,” that makes it through the finest screen is your purest and most valuable, while the coarser screens collect some green matter, but also some pretty decent mid-grade kief. Bubble Hash Technique Bubble Hash came into popularity in the early 2000s in California, where growers realized they could use ice water to freeze the trichomes off of resinous leaf matter. Similarly to the screen technique, several micron sizes of screens (in the form of 5-gallon bucket liners) are used to separate different qualities of the final product. An agitator like a drill with a stirring bit on the end is used to spin the trim in the ice water so all the glands will separate, and the wet goo at each layer of the “bubble bag” screens is collected and dried on coffee filter paper, after which it is pressed into balls or bricks. With this method, you must take care to dry it enough before pressing, or it could get moldy on the inside. The term “bubble hash” comes from the fact that the finished product bubbles when you put a flame to it. Many smokers love the taste and feel of bubble hash. Dry Ice Technique Somewhere along the way, our ever-entrepreneurial stoner colleagues discovered that cold temperatures could be used to break off trichomes without getting the leaf matter wet. This is the Dry Ice Technique. You can buy a kit that comes with the micron bags, a container, and a neoprene jacket to keep your hands from freezing. Place your dry trim in the container with broken bits of dry ice, seal it, and shake it. Careful with this stuff! You can burn yourself. Wear thick gloves or your skin will meld with the dry ice like superglue does to your fingertips. As with the other methods, the length of time you spend agitating the trim, along with the screen micron size will determine the purity of your results. Rosin Technique The Rosin Technique is the latest and potentially the coolest of all these hash techniques because, if done properly, it produces a pure glass-like final product that can be likened to shatter, wax, or BHO, but without requiring the use of a solvent. This technique requires buds (not trim), an electric flat-iron hair straightener, a little scraper tool, and some parchment paper. You simply take a folded piece of parchment paper, place a bud inside of it, and flatten the bud between the heated ironing plates till the resin melts off of the bud and sticks to the paper. It can then be scraped up and stored before it cools down and stiffens up. Because this method involves heat, the THC gets “decarboxylated” in the process, meaning the potency of the resin is maximized. Buds are recommended over trim because trim would cause a prohibitive amount of leaf bits to end up in the finished rosin. Some industry pros are experimenting with t-shirt presses to make the rosin technique doable on a larger scale. And with the right type of high-temperature screen material, the use of trim, rather than only buds, can then be introduced which would make this technique unbeatable as a low-cost, high quality and high yielding option for making cannabis concentrates in large quantities. Send me an email about your favorite about home hash making method and, as usual, send me questions and comments for future articles. I’m here to help! Source: Marijuana Venture Magazine
In this emerging age of state-legal marijuana manufacturing, professional growers need to strive for continually improving results in order to stay viable as businesses. Growing cannabis is somewhat of an art, but it’s also a science in the sense that you can systematically up your game by testing and implementing new equipment and methods. Just like the human body, the full potential of the cannabis plant is unknown and not yet realized. Truly professional growers approach their cultivation technique the same way athletes employ special diets and physical exercises to keep reaching new world records. Here are some tips that help build and maintain a top-notch cultivation facility: Know your medium What are the particular traits of the different root-zone media, and how do their tendencies affect the nutrient regimen and the watering system? Water culture has its own special needs in order to work properly. Cocofiber, inert media (like rockwool), and soils do too. How fast does the water move across the roots and how frequently does it need refreshing with food and oxygen? This will vary quite noticeably from one medium to the next and needs to be identified and balanced as quickly as possible. Since cannabis plants grow and change throughout their lifecycle, balance can be a moving target. They’ll use less food and water when first planted and more over time, with nutrient proportions changing as plants progress through the flowering cycle. Additionally, each medium has its own tendency towards grabbing and releasing nutrients to the plants that depends on several factors such as cation exchange capacity (CEC), pH and microbial activity. Know your water and nutrients Send your source water, your soil mix, and your nutrient solution to a local lab for testing. Your pH and TDS meters will tell you some of the story, but the lab will give you very specific data. When it comes to nutrients, keep in mind that the labels never really tell the whole story. Labeling laws require listing the proportions and percentages of 3 significant nutrients- Nitrogen, Phosphorus, and Potassium (N-P-K), but they don’t require listing details about the 11 others- Calcium (Ca), Sulfur (S), Magnesium (Mg), Boron (B), Chlorine (Cl), Manganese (Mn), Iron (Fe), Zinc (Zn), Copper (Cu), Molybdenum (Mo), Nickel (Ni). Of course marijuana plants prefer a certain proportion of all these elements, but there’s no way to know if your water, medium, and nutrients comprise the right combination without scientific testing. Soil testing labs will accept liquid and soil samples to analyze the quantity of available nutrients, and sending in regular samples for testing will allow pro growers to obtain and create nutrient maps that show where supplementation or adjustments in the feeding regimen are warranted throughout the course of the plant’s lifecycle. Some labs in cannabis-legal states will even accept leaf and flower tissue samples for nutrient analysis. Matching tissue analyses with soil and nutrient data will paint an even-more detailed picture of the needs and trajectory of the garden, which will vary somewhat between different cultivars and environmental conditions. Get to know the strains Dogs are all dogs, but Chihuahuas aren’t much like German Shepherds. The same is true with the physical nature of cannabis strains. They are all cannabis, but some strains are like vines, others are like bushes, and many are in between. Along with different physical profiles come different handling methods, and even feeding regimens. To get the most out of a cannabis garden, growers need to learn how to shape each strain with its own unique pruning technique. Lanky strains react better to more regular pruning early in life while stout strains need time to stretch out. Some strains branch more readily while others need encouragement. Each plant canopy yields the most when the optimal number of flowering tops is maintained. This number can only be determined with experimentation over time. The best growers have found that sweet spot with each strain and learn to train it to its ideal height and density for maximum yield. Minimize Variables Always make sure to properly balance experimentation with reliability. Perhaps the most common trait of a less experienced grower is allowing too many variables in the system, thereby not knowing which product or method is causing what result. Any time a variable can be removed from the equation, steady ongoing improvement becomes more possible. This means measuring and documenting as much data as possible, including photos that reflect the garden’s physical changes that are associated with different handling techniques. The data must be reviewed, analyzed, compared with images, and lab tests in order to achieve optimal results. Cultivate Whole-System Awareness With investors now taking their seats at the table and the wholesale value of cannabis flowers trending downward, good growers should make sure they use the most effective tools and methods to obtain great results. That means using quality testing meters, atomizers for effectively applying sprays, high-efficiency full-spectrum lighting, and reliable environmental control systems. All of these pieces must be assembled into a system that is ergonomic, efficient, safe, and sensible for site workers. Good workflow depends on the right tools and the right environment coming together, and workers always perform better when systems are sensible, simplified, and well explained. Engender Employee Satisfaction Create incentives for site workers to care about results and reward them for improving their outcomes. Legal cultivation facilities receive hundreds of resumes from people excited to legitimately participate in the industry, and this phenomenon has driven down the pay rate simply due to the law of supply and demand. What many facility managers don’t realize is that low-wage replaceable workers rarely go the extra mile to make sure that problems are immediately addressed and details attended to. Flowering plants won’t wait to get help. The flowering process continues to unfold with its own countdown clock, and even one single day of light, nutrient, or pH imbalance will stop plants from reaching their potential. Workers who care about outcomes will stay late to solve a problem as soon as it’s identified, thereby minimizing the potential loss in value to the crop. Cultivators in the legal cannabis industry must embrace complexity as a way of life. Cannabis plants are living beings that are sensitive and reactive to their conditions, just as humans are. But unlike humans, cannabis lives out its whole lifespan in a few short months, rapidly changing every day. Truly professional growers are those who combine a sharp eye with quick reactivity, the right materials, good tracking methods, scientific data, and years of experience. |
AuthorJennifer is a monthly columnist for Marijuana Venture and SF Evergreen Magazines and owns/operates the product review website and blog WeedGear.com. She writes on beginner and advanced cannabis cultivation topics, entrepreneurship, trends & technologies, and DIY cannabis crafts. Here are some recent articles. ArchivesCategories |



 RSS Feed